November 23, 2012

Above The Curve: Fallen Angel

Hello,

Happy Thanksgiving!! I hope all of you had an awesome time with your families. I am pleased to share 'Fallen Angel' with you. Fallen Angel is created by a husband and wife team of Above The Curve.

Above The Curve has made their mission to raise awareness for Shriners Hospitals for Children and Scoliosis. They have also donated money to Breast Cancer Research Foundation through their nail polishes. Also, $1 of every bottle sold is donated to Shriners Hospitals for Children.

Fallen Angel is a holographic nail polish with purple, blue, and pink shimmer. The holographic effect in Fallen angel is much stronger than the Blue Eyed Girl. For me, the holographic effect was much stronger during the day and purple, pink, and blue shimmer were more prominent in the evening. It's like, I am wearing two different polishes, which is a good thing for me. The formula of this polish is perfect and applies like a charm and is opaque in 3 coats. Fallen Angel has a really good wear time too. I am wearing this polish from the past 4 days and all I have got is two small chips. For this mani, I applied three coats of Fallen Angel over 1 coat of Wet N Wild. 

You can purchase Fallen Angel at their Big cartel Store for $8 and at their Etsy Store for $9.
You can also purchase the mini Blue Eyed Girl for $4.50 at their Big cartel Store.
PS: They offer FREE Shipping too.
Also, they are having a special sale at their Big Cartel store. All the full size polishes are for $5.00. The sale will end on Monday at 11:59PM PST. So grab those beautiful polishes before they run out.

Also, check their Facebook page for more information and upcoming polishes.


November 22, 2012

Franken Supplies Sale

Happy Thanksgiving!!

I am pleased to announce that Franken Supplies is having a Black Friday/Cyber Monday Sale.

Franken Supplies offers solvent resistant glitters for making your own nail polishes. The glitters does not bleed or melt and is perfect for frankening. 

Use coupon code BFRIDAY2012 to get 15% off your total order.

The code is valid for both domestic and international orders.

The sale is starting today at 11:59 PM (November 22, 2012) and ending at 11:59 PM on November 26, 2012. PST.

Happy holidays!!


You can check Franken Supplies Shop for solvent resistant glitters. 


You can also check their Facebook page for more updates.


Thanks for looking.
Simran

November 17, 2012

Above The Curve: Blue Eyed Girl

Hello,

How is everyone doing? I hope all of you are having an awesome time. I am very excited to share this new nail polish 'Blue Eyed Girl' with you. Blue Eyed Girl is created by a husband and wife team of Above The Curve.

Above The Curve has made their mission to raise awareness for Shriners Hospitals for Children and Scoliosis. They have also donated money to Breast Cancer Research Foundation through their nail polishes. Also, $1 of every bottle sold is donated to Shriners Hospitals for Children.

Blue Eyed Girl is an electric blue holographic nail polish (so much awesomeness in one sentence). The first thing that came to my mind when I applied this polish was "Wow it Glows" The holographic effect in Blue Eyed Girl is subtle and it was really hard to capture the effect in the pictures. The formula of this polish is perfect and applies like a charm and is opaque in 3 coats. Blue Eyed Girl has a really good wear time. I am wearing this polish from the past 5 days and all I have got is a very small chip on my index finger. For this mani, I applied three coats of Blue Eyed Girl.

You can purchase Blue Eyed Girl at their Big cartel Store for $8 and at their Etsy Store for $9.
You can also purchase the mini Blue Eyed Girl for $4.50 at their Big cartel Store.
PS: They offer FREE Shipping too.

Also, check their Facebook page for more information and upcoming polishes.


November 5, 2012

Democrats Vs. Republicans

Hello,

How is everyone doing? Tomorrow is a very important day for the people in United States. I really hope that those of you who are eligible to vote will vote. I do not care which party you choose but please vote. I will be voting as well but I won't disclose my preference (drama free zone). I am also volunteering to be a poll worker and good news is that I am stationed at a Fire Station (Super Hot Firemen :D). The only downside in that I will be there from 6 in the morning till 9 at night.

For this, I applied 2 costs of Essie Blanc. On accent finger, I made a Democrat sign using Primary Red and Deep Ultra Blue and for the white dots I used .015" white hex glitters. Using the same colors I drew the Republican sign on my middle finger. On the remaining fingers and thumb I drew stripes using the Red acrylic paint and on top of the one-third of the nail I used blue acrylic paint and applied silver holographic stars. 

November 1, 2012

The Battle Nail Polish Challenge Day 1

Hello,

I am so excited to be a part of The Battle Nail Polish Challenge as it has been a really long time since I last participated in a nail challenge. This is my first post for the this Challenge. The theme for today's nails was to create a green and blue manicure. I really like how this manicure turned out. I hope you guys like it too. 

For this, I applied 2 coats of Zoya Song. Then applied Best Glue Ever on all the nails, which I thinned down with water to almost 30-40% as it is easy to apply when thinned down. After the glue dried (it becomes transparent) I applied 1 mm neon green glitters on the tips of all the fingers except the ring finger on which I drew the spiral design using the same glitters.


October 30, 2012

The Battle Nail Polish Challenge

Hello,

I will be participating in The Battle Nail Polish Challenge which is starting from November 1, 2012. I first read about this challenge on Mateji Ustvarjata blog. Citygirl907 of Beautiful Living has created this challenge. This is my Second nail challenge and I am really excited to be a part of it.

The Battle Nail Polish Challenge is do at your will nail challenge. There is no time frame to finish this challenge. You can do no post, one post or several posts in any given week. This challenge is perfect for people who have busy schedules or for a newbie who wants to be a part of a nail challenge but is anxious about keeping up with it. 

If you need more information or be a part of this challenge please contact Citygirl907 of Beautiful Living You can also click the link below for more information. http://theblogforbeautifulliving.blogspot.com/2012/10/battle-nail-challenge-update.html


I will appreciate any suggestions or comments.

Thanks for looking.
Simran

October 25, 2012

Tutorial: Scotch Tape Nails

Hello,

How is everyone doing? I hope all of you are having an awesome time. I am changing the way I used to do tutorials. So instead of having individual pictures and steps, I will have one big picture showing all the steps. I switched to this method because it is very convenient to pin (Yay! for pinterest lovers) the tutorial. I hope you guys like this new method.

I got many requests for the scotch tape tutorial so here is the tutorial for my beloved fans. Steps of the tutorial are at the bottom. This mani is very easy to do. All you need is scotch tape and scissors. Also, you need to have time in your hands and a lot of patience.

You can check my previous scotch tape nails here and here.


Steps:
  1. Apply polish on you nails and tape the bottom one-third of the nail. Make sure the polish is completely dry otherwise the tape will ruin the polish. Also, make sure that the tape is not too sticky. 
  2. Apply the polish of different color (second color) on the nail. The polish will only cover the remaining two-thirs of the nail.
  3. Remove the tape as soon as you finished applying polish. Do not let the polish dry.
  4. Repeat the Step 1 and cover the bottom two-third of the nail with the tape.
  5.  Apply the polish of different color (third color) on the nail. The polish will only cover the top one-third of the nail.
  6. Repeat Step 3 and apply top coat.

Items used: 
Polish: Zoya Ibiza, China Glaze For Audrey, and Essie School of Hard Rocks
Top Coat: Seche Vite
Others: Scotch Tape and Scissors


I will appreciate any suggestions or comments.

Thanks for looking.
Simran

October 22, 2012

Blue Butterfly!

Hello,

How is everyone doing? If you follow me on Facebook then you probably know that I have opened a new shop. I am selling solvent resistant glitters for frankening. If you don't know, solvent resistant glitters are used for making your own nail polishes as these glitters do not melt or bleed. I have tested these glitters for more than 2 months and can assure you that the glitters will perform well. Let me know if you have any questions. You can check my shop here.

For this mani, I wanted to go for a subtle look. Don't get me wrong I love all the Halloween nails that I am seeing these days but wanted some change. It is a very simple design using stamps and I hope you guys like it. For this, I applied 2 coats of Essie Sand Tropez. Then using the Red Angel Plate 119 I stamped the butterfly design on the accent using Zoya Ibiza. 


October 12, 2012

Flakies! Flakies! Flakies!

Hello,

I am so in love with Finger Paints Special Effects Collection. I have done a mani using Zoya Raven and Finger Paints Twisted before and used Twisted only on the tips in that mani. You can check that post here. Twisted is a mix of all different kind of flakies and I would call it a rainbow effect.

For this, I applied 2 coats of Zoya Raven which is a metallic/cream finish. After it dried I applied Finger Paints Twisted. To give it a matte look, I applied a coat of China Glaze Matte Magic. This mani looks really cool in person but it does not last long like a regular mani. So after the first day, I applied Seche Vite.


September 19, 2012

Bling It On

Hello,

I have a big surprise coming for you guys. I do not want to disclose it right now but I will post about this surprise on my Facebook page within a couple of weeks. I got a request for doing nails using rhinestones over nude polish. This is a very easy design and if you do not have glue you can use topcoat to adhere the rhinestones and glitters. Also, it looks much more color coordinated in person as the gold square glitters reflect a lot and do not show their true color in pictures.

For this, I applied 2 coats of Zoya Minka. Then applied Best Glue Ever on all the nails, which I thinned down with water to almost 30-40% as it is easy to apply when thinned down. After the glue dried (it becomes transparent) I applied 2 mm gold square rhinestones on the accent nail and on other fingers I applied 1.5 mm gold square glitter.


August 29, 2012

Zoya Sooki

Hello,

For this, I used Zoya Sooki which is a beautiful red cream and my go-to red nail polish.  It is bright and cool cherry red cream with a very subtle jelly finishThe formula of this polish is perfect and it is opaque in 2 coats. The dry time of this polish is average. Zoya Sooki came out in the summer of 20011 in Zoya's Summer Time Collection. Also, It is big 3 free.


August 25, 2012

Secret Ingredient

Hello,

How is everyone doing? I have heard a lot of people using eyeshadows or micas in their nail art or frankens. This is my first time using an eyeshadow for any nail art so I wanted to keep the use of eyeshadow to the minimal. I really like how this mani turned out. The eyeshadow looks so smooth, it seems like I have applied golden nail polish. I hope you guys give it a try too as the process is very easy.

For this, I applied one coat of Zoya Sabrina. On the tips, I applied Best Glue Ever which I thinned down with water to almost 30-40% as it is easy to apply when thinned down. After the glue dried (it becomes transparent) I applied the L.A. Colors bronze eyeshadow with the help of the fan brush. I light rubbed the eyeshadow on the glue to get the smooth finish. Then, I applied fimo flower on my accent nail and drew some leaves using Holly Green acrylic paint. 


August 23, 2012

Scotch Tape Nails

Hello,

How is everyone doing? I am little sad as I twisted my ankle while walking down the stairs yesterday. Clumsy me. I am feeling much better today but still have to rest for one more day. Enough jabbering, now onto nails. I love scotch tape nails but they are pain to do. They are not hard to do, it's just the waiting time that gets me. I hope you guys like it.

For this, I applied 2 coats of China Glaze For Audrey. Then waited for it to completely dry and placed a scotch tape covering one-third of the nail at the bottom and applied Essie School of Hard Rocks. I removed the  scotch tape when the polish was still wet as it doesn't give thick edges. After School of Hard Rocks dried, I again applied a scott tape covering the two-thirds of the nail at the bottom and applied Zoya Ibiza and removed the tape when the paint was still wet. It is very important to have nail polish completely dry before you apply scott tape otherwise the polish will stick to the tape when you will try to remove it and will ruin your manicure.

August 22, 2012

Zoya Back To School Promo

Hello,

Good news from Zoya!

Enjoy this new back to school promo from Zoya 'But any one nail polishes and get one free'. You can choose upto four colors of your choice and you will get four colors of your choice free. Thank you Zoya for another awesome promo. This promo is valid till August 28th, 2012 11:59PM EST.

The code: People with Zoya.com account will have their own personalized BOGO code under the "My Coupons & Promo Codes' section. 

It gets even better; FREE Shipping with 6 or more polishes (just have to buy 3 and 3 will be free). 

Simran


As a thank you to all customers with Zoya.com accounts**, we made a special Back to School BOGO (Buy 1 Get 1 Free) offer just for you! Your personalized BOGO code can be found in the "My Account" Section of www.zoya.com under the "My Coupons & Promo Codes" section. In case you were wondering... YES Free Shipping is available! Read below for more details.

To celebrate back to school season, Buy ANY One Zoya Nail Polish (0.5oz) and Get One FREE* 8/22/12- 8/29/12 11:59pm ET. This special offer is up to 8 bottles total (buy 4 get 4 free).

It gets even better...


BONUS OFFER! You will receive FREE Standard Shipping with 6 or more bottles (buy 3 get 3 free)!

How It Works
  1. Sign in to your account at www.zoya.com
  2. Click My Promotions and Coupons on the left hand side of the screen under My Account
  3. Apply your unique, personalized code
  4. Add polishes of choice to your shopping cart.
  5. Include any additional items you would like to purchase.
  6. Continue with the check-out process, Review & Submit your order. 
    *Please double check all information is CORRECT and ALL FIELDS have been completely filled out PRIOR to submitting the order. 
    There is NO WAY to issue a new code after the order has been processed.

*Offer open only to those with active accounts** on Zoya.com, artofbeauty.com, Qtica.com and qticasmartspa.com as of 8/22/2012 at 12 PM EDT. Consumer orders only. Online promotion only. Continental US ONLY. BOGO offer good for up to 8 polishes. BOGO Offer* code is unique and non-transferable. One code per accountCode expires on 8/29/2012 at 11:59PM EDT. If volume is higher than expected, please allow up to 4 weeks for shipping and processing. Comments, videos and pictures posted about this Zoya.com BOGO Offer* outside of Zoya.com or zoyanailpolish.blogger.com are not representative of the opinions of Zoya Nail Polish, Art of Beauty, Inc., Qtica and Qtica Smart Spa and we do not confirm the accuracy of any postings.
**qualifying accounts are those with a valid username (email) and password that has been created and used in the last 3 years account must be made by 3/22/2012 at 12PM EST to qualify for the BOGO Offer. No purchase necessary to start an account. Customers are responsible for maintaining active accounts. If username or password have been lost we (Art of Beauty, Inc.) are not responsible for restoring accounts or giving out any account information. 

August 21, 2012

Bundle Monster 310

Hello,

How is everyone doing? I got my hands on the new Bundle Monster stamping plates two weeks ago. I have to give it to Bundle Monster that they are getting better every time they come out with the new set of stamping plates. I really like this set as there are so many cute designs and not much (only two) french design plates. I do not know about you guys but I have really hard time stamping those french designs. Now onto today's mani, this design gives a very clean look and I hope you guys like it.

For this, I applied 2 coats of Zoya Brizia. Then using a Bundle Monster image plate 310 I stamped the net design using Ulta Salon Formula Wild Night. I have an obsession of doing something extra on my accent finger so I applied antique copper micro beads.


August 20, 2012

Konad

pic name
26
pic name
53
pic name
25
pic name
25
pic name
65

August 19, 2012

Carousel over Zoya Creamy

Hello,

How is everyone doing? Well I am having too much fun creating franken polishes. Today's post is about the new franken I created last week. With the help of other frankeners I named it Carousel. I really like how Carousel turned out. I hope you guys like it too. 
For this, I applied 2 coats of Zoya Creamy. Then applied one coat of Carousel which is created by me. Carousel consists of pink, blue, orange, green, and purple glitters of different sizes and shapes in a yellow jelly base. You can see the bottle as well as macro shot of the polish at the bottom. 


August 15, 2012

Black and Silver Maze

Hello,

I hope everyone is having an awesome time. It is so hot here in California that I do not feel like doing anything. Well doing nails is an exception :D.  Today's mani is very simple. I used stamping for this design and I hope you guys like it. 

For this, I applied 2 coats of Zoya TrixieThen using the Konad image plate M65, I stamped the geometrical design on all the fingers using Wet N Wild Black Cream. I really like this color combination and the design looks like a maze. At some angles, it looks like I have applied nail foils because of the way Zoya Trixie reflects. 


August 13, 2012

Zoya Elodie

Hello,

For this, I used Zoya Elodie which is a bright salmon color cream. It is bright and warm melon pink cream with a touch of a coralThe formula of this polish is perfect and it is opaque in 2 coats. The dry time of this polish is average. Zoya Elodie came out in the summer of 2008 in Zoya's Gossip Collection. Also, It is big 3 free.


August 11, 2012

Team USA

Hello,

It's official. I'm a slacker. I always promise myself that I will write a blog post tomorrow but unfortunately that tomorrow never comes (at last it did!). I have so much stuff planned out for my blog, so many new ideas but I just have to put myself together. This post is a super late as tomorrow is the last day of olympics but I thought it might be good for closing ceremony. Go team USA!

For this, I applied 2 costs of Essie Blanc. On accent finger, I made stripes using the Red acrylic paint and on top of the one-third of the nail I used blue acrylic paint and made dots on it using a dotting tool and white acrylic paint. On the middle finger I made 5 Olympic rings using the acrylic paints (you  can check the name of the paints at the bottom of the page) and wrote 2012 using the black acrylic paint. On index finger and pinkie I used the paints to draw the lines (same ones as middle finger).

July 13, 2012

Fierce Red Tips

Hello,

Today I have another nail foil mani. I like how the foils can transform your simple mani into something so gorgeous. I love the tips so much in this mani that I might do more looks like this in the future. Click here if you want to check my last post on nail foils.

For this, I applied one coat of Zoya Bela. After it dried, I made a french tip using Essie Fishnet Stocking. Then using a Konad image plate M25 and RA 118 (picture of the plates at bottom) I stamped the roses using Sally Hansen Insta Dri Rapid Red and drew some leaves using Holly Green acrylic paintOn the tips, I applied Best Glue Ever which I thinned down with water to almost 30-40% as it is easy to apply when thinned down. After the glue dried (it becomes transparent) I applied the metallic red nail foil. Then using a Q-tip I rubbed over the foil so that it attaches itself properly. After that I applied Wet N Wild top coat because for some reason fast drying top coat does not work well with the foils, at least not for me. In the end I applied Seche Vite top coat on all the fingers.


July 10, 2012

Review: Born Pretty Store Stamping Plate CK-02

Hello,

I received this stamping plate in April, but I was so busy with my school that I never got a chance to review or use this plate. I was very excited when Born Pretty store contacted me to review their products and asked me to choose one of their item. I had been eyeing these stamping plates for a really long time so it seemed like a perfect opportunity and I chose 42 pattern Stamping Plate CK-02.

The plate comes covered in a blue plastic cover (similar to the bundle monster blue cover). The cover is easy to remove. You must take out this cover before using this stamping plate. The plate is very sturdy and has a backing like most stamping plates. The designs are very nicely engraved.


July 6, 2012

Black and White Nail Challenge

pic name
Day 1
pic name
Day 2
pic name
Day 3
pic name
Day 4
pic name
Day 5
pic name
Day 6
pic name
Day 7
pic name
Day 8
pic name
Day 9
pic name
Day 10

July 4, 2012

July 4th Nails

Hello,

Happy 4th of July everyone. I am very excited to start blogging again as it has been a really long time since I last blogged. A lot of things happened in the past couple of months. First, I graduated with my bachelors degree. Second, I shifted to a new place. Also, I have been planning to write a blog for about two weeks now but could not make up my mind which design or shade to blog about (kinda anxious I guess). 4th of July seemed like a perfect opportunity to start blogging again.

I started franking after getting annoyed and frustrated with the process of purchasing some of the indie polishes. At present, I am making polishes just for personal use (you never know what the future holds).
For this, I applied 2 coats of Zoya Trixie. Then applied one coat of Patriot which is a created by me. Patriot consists of blue, red, white and silver glitters of different sizes and shapes and it also consist of small blue stars in a clear base. This is my first franken and I am really satisfied with it. You can see the bottle as well as macro shot of the polish at the bottom. 


March 29, 2012

Black and White Challenge Day 10

Hello,

I am so excited that my spring break started. I have the whole next week off which is awesome. I apologize again for not uploading this post yesterday because I was on road going back to my parents home. It feels really good to be back home. It is so hard to believe that this was the last nails design for the Black and White nail challenge. I had so much fun doing this nail challenge and I enjoyed looking at the designs of all the girls who were participating in this challenge.

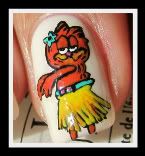
For this, I uploaded a step by step tutorial for you. I think this is most hardest design I have ever done on nails. But I love garfield so I loved every bit of it. I did this design a couple of days ago for a nail challenge which I did not win.

PS: I have a giveaway going on right now. Enter here.


March 25, 2012

Black and White Challenge Day 9

Hello,

This is my ninth post for the Black and White Nail Challenge. The theme for today's nails was  water marbling. It is hard to believe that this nail challenge is almost over, only one more nail challenge day left. This is the first time I did water marbling and I had such a hard time. I experimented with so many polishes that did not work at all. 

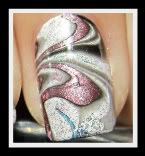
For this, I applied 2 coats of Essie Blanc. After it dried I started working on the water marbling. This is the order I used the Polishes for water marbling: Zoya Raven, Essie Blank, Zoya Trixie, China Glaze Adore, and at last China Glaze Admire. I really like how my ring finger turned out but other than that it is a mess especially my pinkie and index finger. Hopefully with practice I will get better at this. 

PS: I have a giveaway going on right now. Enter here.


100 Followers Giveaway!

Hello,

A promised, here is my first giveaway for reaching 100 followers on my blog. I am really excited for this giveaway. There will be two winners in this giveaway. Unfortunately the Color Club polishes do have their names on the bottle so I will just name them CC#1, 2 and, 3.

First winner will get three polishes. First one is Color Club#1 which looks like a melon pink cream with a hint of coral. Second, Nicole by OPI It's Not Blue, It's me. Third is Color Club #2 which look like a light pink cream.

CC#1, NOPI: It's Not Blue It's Me, CC#2

Second winner will get two polishes. First is Color Club #3 which looks like a pink cream and the second one is Wet N Wild Night Prowl.
CC #3, Wet N Wild Night Prowl

Rules:
- Open to U.S. residents only.
- Must be 18 years or older to enter.
- Fill out the Rafflecopter below to enter this giveaway.
- Winner must email me back within 24 hours or else a new winner will be chosen.
- Giveaway closes on Sunday, April 15th 2012.
- Any questions, please contact me at lacqueredtips@gmail.com

Thanks for looking.
Simran

a Rafflecopter giveaway

March 23, 2012

Black and White Challenge Day 8

Hello,

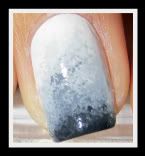
This is my eighth post for the Black and White Nail Challenge. The theme for today's nails was to create a manicure using Sponge. I apologize for uploading this tutorial late as I had the most busy day yesterday and came home very late and was too tired to work on a mani and upload it. 


For this, I applied 2 coats of Essie Blanc. After it dried I mixed a little Wet N WIld Black Cream with Essie Blanc to give it a very light grey shade and sponged it. I repeated this step again a couple of times every time increasing its intensity by adding a little more black polish. In the end I sponged the tips using the same black polish. It gives it a gradient look.


March 19, 2012

Black and White Challenge Day 7

Hello,

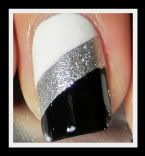
This is my seventh post for the Black and White Nail Challenge. The theme for today's nails was to create a manicure using black, white, and glitters. I am still not feeling well but much better than yesterday. Yesterday, I was so miserable that I went to doctor first thing in the morning and I can see a little improvement. Hopefully tomorrow will be better.


For this, I applied 2 coats of Essie Blanc. Then waited for it to completely dry and placed a scotch tape covering one-third of the nail at the bottom and applied Zoya Trixie. I removed the  scotch tape when the polish was still wet as it doesn't give thick edges. After Trixie dried, I again applied a scott tape covering the two-thirds of the nail at the bottom and applied Wet N Wild Black Cream and removed the tape when the paint was still wet. It is very important to have nail polish completely dry before you apply scott tape otherwise the polish will stick to the tape when you will try to remove it and will ruin your manicure.


March 17, 2012

St. Patricks Day Nails

Hello,

Happy St. Patricks day everyone! I hope you had a great time. I am down from cold and fever so was in my bed all day :( but still got a chance to do my nails. I think I have an attachment to green polish as it makes me feel relaxed. I used stamping for his design and I hope you guys like it.

For this, I applied 2 coats of Zoya Shawn. Then using a Shany stamping image plate SH12 I stamped the shamrocks using Sally Hansen Color Quick Fast Dry Nail Color Pen in Green Chrome and China Glaze 2030. After that I applied green glitter in the middle of each shamrock.


March 16, 2012

Black and White Challenge Day 6

Hello,

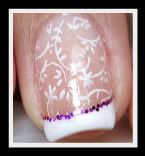
This is my sixth post for the Black and White Nail Challenge. The theme for today's nails was to create a manicure using a color base with something white. I am not feeling well today so I settled with a stamping manicure and I like how it turned out.

For this, I applied 2 coats of OPI I'll Take The cake. Then using the Shany (2012) image plate SH21 I stamped the design on all the fingers using Konad white stamping polish. After it dried I made a french tip using Essie Blanc. Then applied purple glitters along the french tip.


March 13, 2012

Black and White Challenge Day 5

Hello,

This is my fifth post for the Black and White Nail Challenge. The theme for today's nails was to create a manicure using a color base with something black. After all the detailed designs, I wanted something simple and neat and this design fits perfectly. 

For this, I applied 2 coats of Zoya Jules. Then using the Konad image plate 209 I stamped the design on all the fingers using Wet N Wild Black Cream. This design looks really weird on the image plate and I assumed I was never going to use it as the size of all the nail are different and this whole design won't make any sense. However using only one side of the design works and if you can align it perfectly it will look really nice. I was in hurry so my lines are going everywhere. 


March 12, 2012

Zoya Spring Promo

Hello,

Good news from Zoya!

Enjoy this new promo from Zoya 'But any 3 nail polishes and get 3 free'. You can choose any six colors of your choice. Thank you Zoya for another awesome promo. This promo is valid till March 14th, 2012 11:59PM EST.

The code is SPRING3

Simran

March 10, 2012

Black and White Challenge Day 4


Hello,

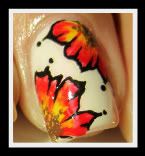
This is my fourth post for the Black and White Nail Challenge. The theme for today's nails was to create a manicure using a white base with some color. This is my first attempt at doing one stroke flower and I really like how it turned out. I learned this technique on youtube from Tartofraises1


For this, I applied three coats of OPI Fit for a Queensland which is an off white color. Then using the red and yellow acrylic paint I drew a flower on each finger except ring finger on which I drew two half flowers. It may look kinda messy in the beginning and the flowers don't make any sense but it turns out fine when you put everything together ( I almost removed it after doing my first flower because it looked like a blob of paint). After it dried, I used a black acrylic paint to draw an outline of the flowers and some random dots on the side. Then using the brown acrylic paint and a dotting tool I made some dots in the middle of the flower.


PS: I am planning to have my first giveaway when I reach 100 members on my blog. So spread the word ladies.